Set up a delightful custom prompt for PowerShell
For some time now, I’ve been wanting to customize my terminal to get more out of it. This motivation specially started after watching people like Takuya Matsuyama (@craftzdog) flying through the command-line with their awesome setups.
So, the other day, I finally decided to do the same on my Windows machine. Surprisingly, it just required a few simple tweaks with PowerShell and tools like Oh My Posh to completely transform the command prompt taking it to a whole new level with features like:
- Customizable colors, themes, text fonts, and icons to enhance the appearance.
- Display of Git branch information directly in the prompt.
- Aliases for quicker command execution.
- Command-line tab auto-completion and command history.
- Directory jumping based on history, facilitating navigation.
- Implementation of custom functions to automate tasks.
Check out how it looks in the screenshot below:

In this post, I’ll walk you trough the process of setting up these tools. Most of the configuration will be stored in a single file that PowerShell will use when it starts up. To make it easier to follow along, you can refer to my personal setup file for reference.
Whether you want to implement a few of these steps or go all-in, I hope that this post turns out useful and that it will make your command-line experience way more fun and productive.
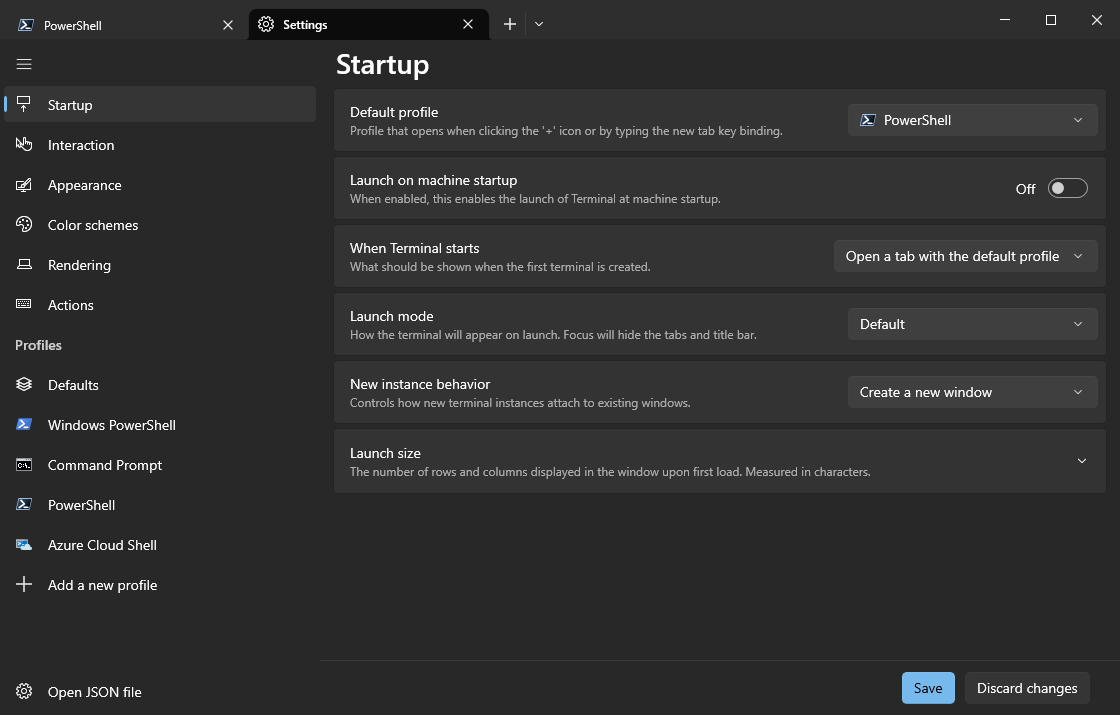
Pre-requisites: Windows Terminal and PowerShell
If you don’t already have Windows Terminal and Powershell, the easiest way to get them is by installing them from the Microsoft Store.
After installing PowerShell, you can set it as the default shell in Windows Terminal if you want it to be the default option when launching the terminal.
Install a Nerd Font
The custom themes we are about to install in the following steps utilize glyphs (icons) to style the command prompt. To ensure that all glyphs are displayed correctly in the terminal, it is recommended to install a Nerd Font.
Choose a font of your preference (I chose Hack), download it, and unzip the file. Then, right-click on the font file and select Install to install it on your system.
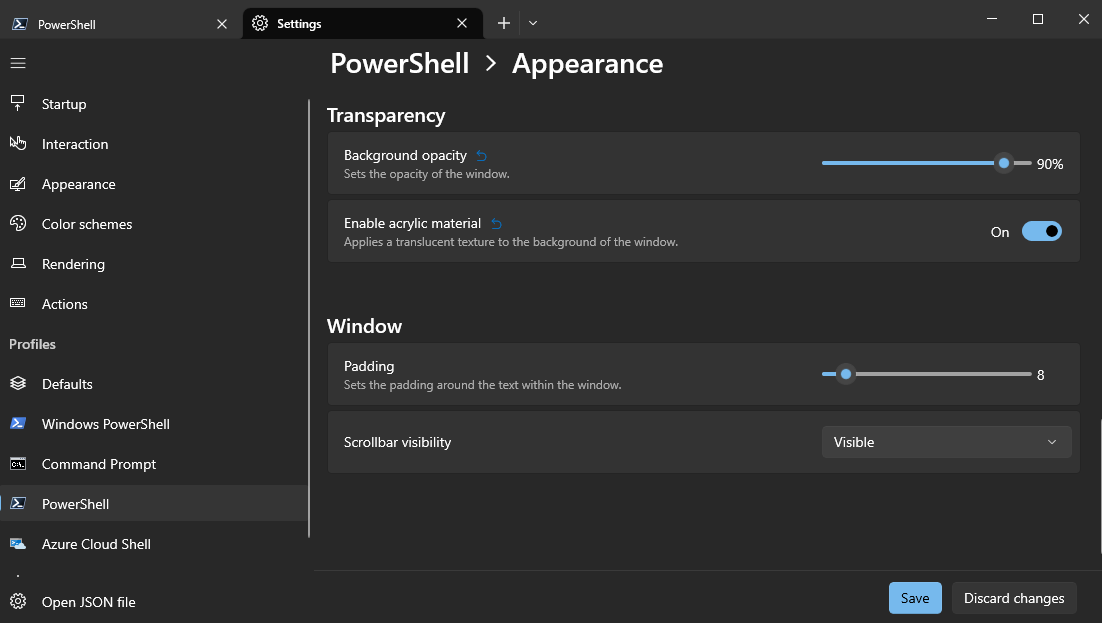
Next, open the Windows Terminal Settings, select the Powershell profile, and go to the Appearance tab. From the Font face drop-down menu, select the newly installed font.

Change the color scheme
Additionally, within the Appearance tab, you have the option to customize the color scheme according to your preference. Personally, I prefer dark themes for everything, so I chose the One Half Dark theme.
Depending on your own preferences, you may also want to consider making the background of your terminal slightly translucent. To do this, you can find the Transparency settings within the same tab.
Experiment with adjusting the values for Background opacity and toggling the Enable acrylic material option until you find the configuration that you personally like. In my case, I set the opacity to 90% and enabled the acrylic material feature.
Create a Powershell profile
The remaining configuration is defined in the PowerShell profile. As mentioned earlier, this file is essentially a script that runs when PowerShell starts and it can include commands, aliases, functions, variables, modules, and more.
The $PROFILE variable stores the path to the PowerShell profile for the current user and current host in your machine. If you have recently installed PowerShell, it’s likely that this directory doesn’t exist on your computer. In any case, to create it without risking overwriting an existing profile, execute the following command:
if (!(Test-Path -Path $PROFILE)) {
  New-Item -ItemType File -Path $PROFILE -Force
}
This will allow adding your PowerShell configuration directly on your $PROFILE file. However, for better control over your configuration files, it is recommended to create a separate file that will be later imported into the $PROFILE. In my case, I created a directory in my home directory (Users/{username}):
mkdir .config/powershellNavigate to this directory and create a PowerShell user profile with the extension .ps1. I’ve just named it user_profile.ps1.
Next, we need to import this file into the $PROFILE. Open it using your preferred text editor (just replace nvim if you use any other editor, such as notepad):
nvim $PROFILEAdd a line similar to the one below to import your configuration file. The specific path will depend on where you created your .ps1 configuration file. You can use the USERPROFILE enviroment variable to prepend the home directory to the path where you created the file:
. $env:USERPROFILE\.config\powershell\user_profile.ps1The next steps will basically consist in configuring the PowerShell environment by adding PowerShell commands (also called cmdlets) to the profile.
Set some aliases
Aliases are essentially shortcuts that map one command to another. They come in handy by saving you from typing long commands or remembering different command names across various operating systems.
Creating aliases in PowerShell is straightforward using the Set-Alias cmdlet. The syntax is as follows:
Set-Alias {command name} {command to run}For instance, a useful alias for users of Unix-like operating systems is mapping ls to ll, as ls provides a similar file listing as the Unix command ll. To create this alias, add the following line to your profile:
Set-Alias ll lsNow is a good time to test if PowerShell correctly configured to use your profile file. Restart your profile with this command:
. $PROFILEAfter restarting, simply type the alias on the command prompt. If it functions as expected, it indicates that your profile has been correctly configured.
Install posh-git
Let’s begin by installing the first module, posh-git. This module seamlessly integrates Git and PowerShell by offering Git status summary information that can be displayed in the PowerShell prompt.
To install posh-git, use the following command, which uses the PowerShell gallery:
Install-Module posh-git -Scope CurrentUser -ForceTip: To view the PowerShell gallery modules you have installed at any time, you can use the following command:
Get-InstalledModuleInstall Oh My Posh
Oh My Posh is a highly customizable prompt framework for PowerShell that allows us to change the styling of the command-prompt. These preferences are defined in a theme, which can be either custom-made or chosen from their extensive community library.
To install Oh My Posh, you can use the winget package manager:
winget install JanDeDobbeleer.OhMyPosh -s wingetNote: If you need to update Oh My Posh, simply run the command:
winget upgrade JanDeDobbeleer.OhMyPosh -s wingetAfter installing Oh My Posh, you’ll need to restart the terminal and add the initialization of Oh My Posh to your profile:
Oh My Posh init pwsh | Invoke-ExpressionAdd a theme to Oh My Posh
To use a theme, add the following command to your PowerShell profile, replacing POSH_THEMES_PATH with your preferred theme:
Oh My Posh init pwsh --config "$env:POSH_THEMES_PATH/jandedobbeleer.omp.json" | Invoke-ExpressionYou can explore the full list of themes here.
Install icons
Another visual enhancement we can leverage through PowerShell modules is the ability to display icons representing file types next to file names when listing directories. To add these icons, we can install the Terminal-Icons module:
Install-Module -Name Terminal-Icons -Repository PSGalleryAnd import it in your Powershell profile:
Import-Module -Name Terminal-IconsInstall z (directory jumping)
The z module is incredibly useful as it enables quick navigation through the file system based on your command history. With z, you can simply type z followed by a keyword in the command prompt, and it will search your command history for the closest match and automatically navigate to that directory.
For instance, if you previosly navigated to the directory C:\path\to\my-cool-project, typing z cool, you will be automatically taken to that directory.
To install z, run the following command:
Install-Module -Name zConfigure PSReadLine
PSreadline is a module that comes pre-installed with the latest versions of PowerShell and allows us to configure the behavior of command line editing. One particularly useful feature is the predictive IntelliSense, which provides command predictions based on your command history as you type. To enable this, simply add the following line to your profile:
Set-PSReadLineOption -PredictionSource HistoryYou can further configure how PSReadLine displays the predictions. By default, they appear on the same line as your input, but you can also enable a list view by using the following configuration:
Set-PSReadLineOption -PredictionViewStyle ListViewAnother great feature of PSReadLine is the ability to customize key bindings. For example, if you want to emulate Bash or Emacs key bindings, add the following line:
Set-PSReadLineOption -EditMode EmacsAdd custom functions
Finally, one of my favorite features of PowerShell is its ability to easily add custom functions, providing limitless possibilities for automation.
To illustrate this, let’s consider a function that I frequently use, especially when working on collaborative projects: deleting Git branches that match a specific pattern. For instance, if I have multiple branches containing the word “hotfix” that I no longer need, I would like to delete them all at once. Here’s an example function that automates this process:”
function delete-branches ($pattern) {
  # Get all branch names that match the pattern
  $branchesToDelete = git branch | Where-Object { $_ -match $pattern }

  if ($branchesToDelete.Count -eq 0) {
    Write-Host "No branches found matching the pattern '$pattern'."
  }

  # Prompt for confirmation before deleting
  $confirmationMessage = "The following branches will be deleted: `n$($branchesToDelete -join "`n")`nDo you want to proceed? (Y/N)"
  $confirmation = Read-Host -Prompt $confirmationMessage

  if ($confirmation -eq "Y" -or $confirmation -eq "y") {
    foreach ($branch in $branchesToDelte) {
      git branch -D $branch.Trim()
    }
    Write-Host "Branches deleted successfully."
  } else {
    Write-Host "Operation cancelled."
  }
}
Then, simply typing delete-branches hotfix will run the function above, prompt a list of branches that match the pattern hotfix and ask you for confirmation to delete them all.
Conclusions
I hope you found this tutorial useful and that it inspired you to start utilizing these productivity hacks. Personally, I’m really happy with the results, and I have already noticed a significant improvement in the overall experience of using the terminal, making it more enjoyable and efficient.